Silicon Labs EFR32
This port brings the Silicon Labs EFR32 series of MCUs to Circuitpython.
Refer to mpconfigport.mk for a full list of enabled modules sorted by family.
How this port is organized
boards/ contains the configuration files for each development board and breakout available on the port, as well as system files and both shared and SoC-specific linker files. Board configuration includes a pin mapping of the board, oscillator information, board-specific build flags, and setup for other peripherals where applicable.
common-hal/ contains the port-specific module implementations, used by shared-module and shared-bindings.
peripherals/ contains peripheral setup files and peripheral mapping information, sorted by family and sub-variant. Most files in this directory can be generated with the python scripts in tools/.
supervisor/ contains port-specific implementations of internal flash and serial, as well as the port.c file, which initializes the port at startup.
tools/ contains the Silicon Labs Configurator (SLC) tool, python scripts for generating peripheral and pin mapping files in peripherals/ and board/.
At the root level, refer to mpconfigboard.h and mpconfigport.mk for port specific settings and a list of enabled modules.
Prerequisites
Please ensure you set up your build environment appropriately, as per the guide. You will need:
Linux: https://learn.adafruit.com/building-circuitpython/linux
Windows Subsystem for Linux (WSL): https://learn.adafruit.com/building-circuitpython/windows-subsystem-for-linux
macOS: Not supported yet
Install necessary packages
sudo apt install default-jre gcc-arm-none-eabi wget python3 python3-pip git git-lfs gettext uncrustify
sudo python -m pip install --upgrade pip
Note that this uses git lfs and will not link without it. The error is something like “Unknown file format” because git lfs has a text placeholder file.
Supported boards
Board |
Code |
Build CMD |
|---|---|---|
xG24 Dev Kit |
brd2601b |
devkit_xg24_brd2601b |
xG24 Explorer Kit |
brd2703a |
explorerkit_xg24_brd2703a |
SparkFun Thing Plus MGM240P |
brd2704a |
sparkfun_thingplus_matter_mgm240p_brd2704a |
Build instructions
Ensure your clone of CircuitPython is ready to build by following the guide on the Adafruit Learning System. This includes installing the toolchain, synchronizing submodules, and running mpy-cross.
Clone the source code of CircuitPython from GitHub:
$  git clone https://github.com/SiliconLabs/circuitpython.git
$  cd circuitpython/ports/silabs
$  make fetch-port-submodules
Checkout the branch or tag you want to build. For example:
git checkout main
Follow the guide below to install the required packages for the Silicon Labs Configurator (SLC): https://www.silabs.com/documents/public/user-guides/ug520-software-project-generation-configuration-with-slc-cli.pdf
Once the one-time build tasks are complete, you can build at any time by navigating to the port directory:
make BOARD=explorerkit_xg24_brd2703a
You may also build with certain flags available in the makefile, depending on your board and development goals:
make BOARD=explorerkit_xg24_brd2703a DEBUG=1
Clean the project by using:
make BOARD=explorerkit_xg24_brd2703a clean
Flashing CircuitPython
Flash the project by using Simplicity Commander:
make BOARD=explorerkit_xg24_brd2703a flash
Running CircuitPython
Connecting to the Serial Console
Connect the devkit to the PC via the USB cable. The board uses serial for REPL access and debugging because the EFR32 chips has no USB support.
Windows
On Windows, we need to install a serial console e.g., PuTTY, MobaXterm. The JLink CDC UART Port can be found in the Device Manager.
Linux
Open a terminal and issue the following command:
ls /dev/ttyACM*
Then note down the correct name and substitute com-port-name in the following command with it:
screen /dev/'com-port-name'
Using the REPL prompt
After flashing the firmware to the board, at your first connecting to the board, you might see a blank screen. Press enter and you should be presented with a Circuitpython prompt,>>>. If not, try to reset the board (see instructions below).
You can now type in simple commands such as:
>>> print("Hello world!")
Hello world!
If something goes wrong with the board, you can reset it. Pressing CTRL+D when the prompt is open performs a soft reset.
Recommended editors
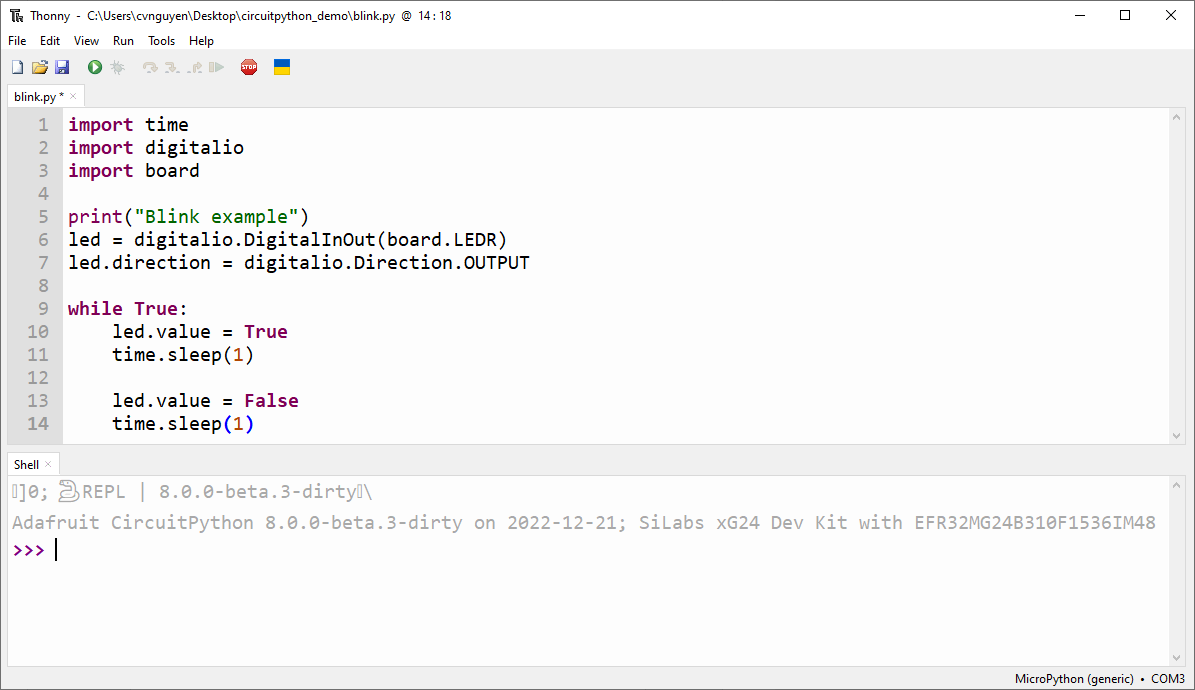
Thonny is a simple code editor that works with the Adafruit CircuitPython boards.
Config serial: Tools > Options > Interpreter > Select MicroPython > Select Port Jlink CDC UART Port
Running CircuitPython scripts
At the boot stage, two scripts will be run (if not booting in safe mode). First, the file boot.py will be executed. The file boot.py can be used to perform the initial setup. Then, after boot.py has been completed, the file code.py will be executed.
After code.py has finished executing, a REPL prompt will be presented on the serial port. Other files can also be executed by using the Thonny editors or using Ampy tool.
With the boards which support USB mass storage, we can drag the files to the board file system. However, because the EFR32 boards don’t support USB mass storage, we need to use a tool like Ampy to copy the file to the board. You can use the latest version of Ampy and its command to copy the module directories to the board.
Refer to the guide below for installing the Ampy tool:
https://learn.adafruit.com/micropython-basics-load-files-and-run-code/install-ampy